About Me

My photo
I've taken a recent obsession with nails! I'm a server at a restaurant, where I am constantly pointing at menus and using my hands, so I began to get my nails done. A basic french manicure, although professional, began to bore me so I got fun designs like strips and polka dots. Unfortunately, the more complicated the design was the more complicated it was trying to describe what I wanted at the nail salon. So I have literally taken things into my own hands. In this blog, I'd like to explore different brands of nail polish/nail care and share different designs.

Wednesday, September 28, 2011

Animal Prints Week 1: Cheetah

This colorful, fun, and daring design is my own personal expression of the cheetah print! Take it as an ode to Lisa Frank. See how simple it is to create in the steps below!

WHAT YOU NEED:

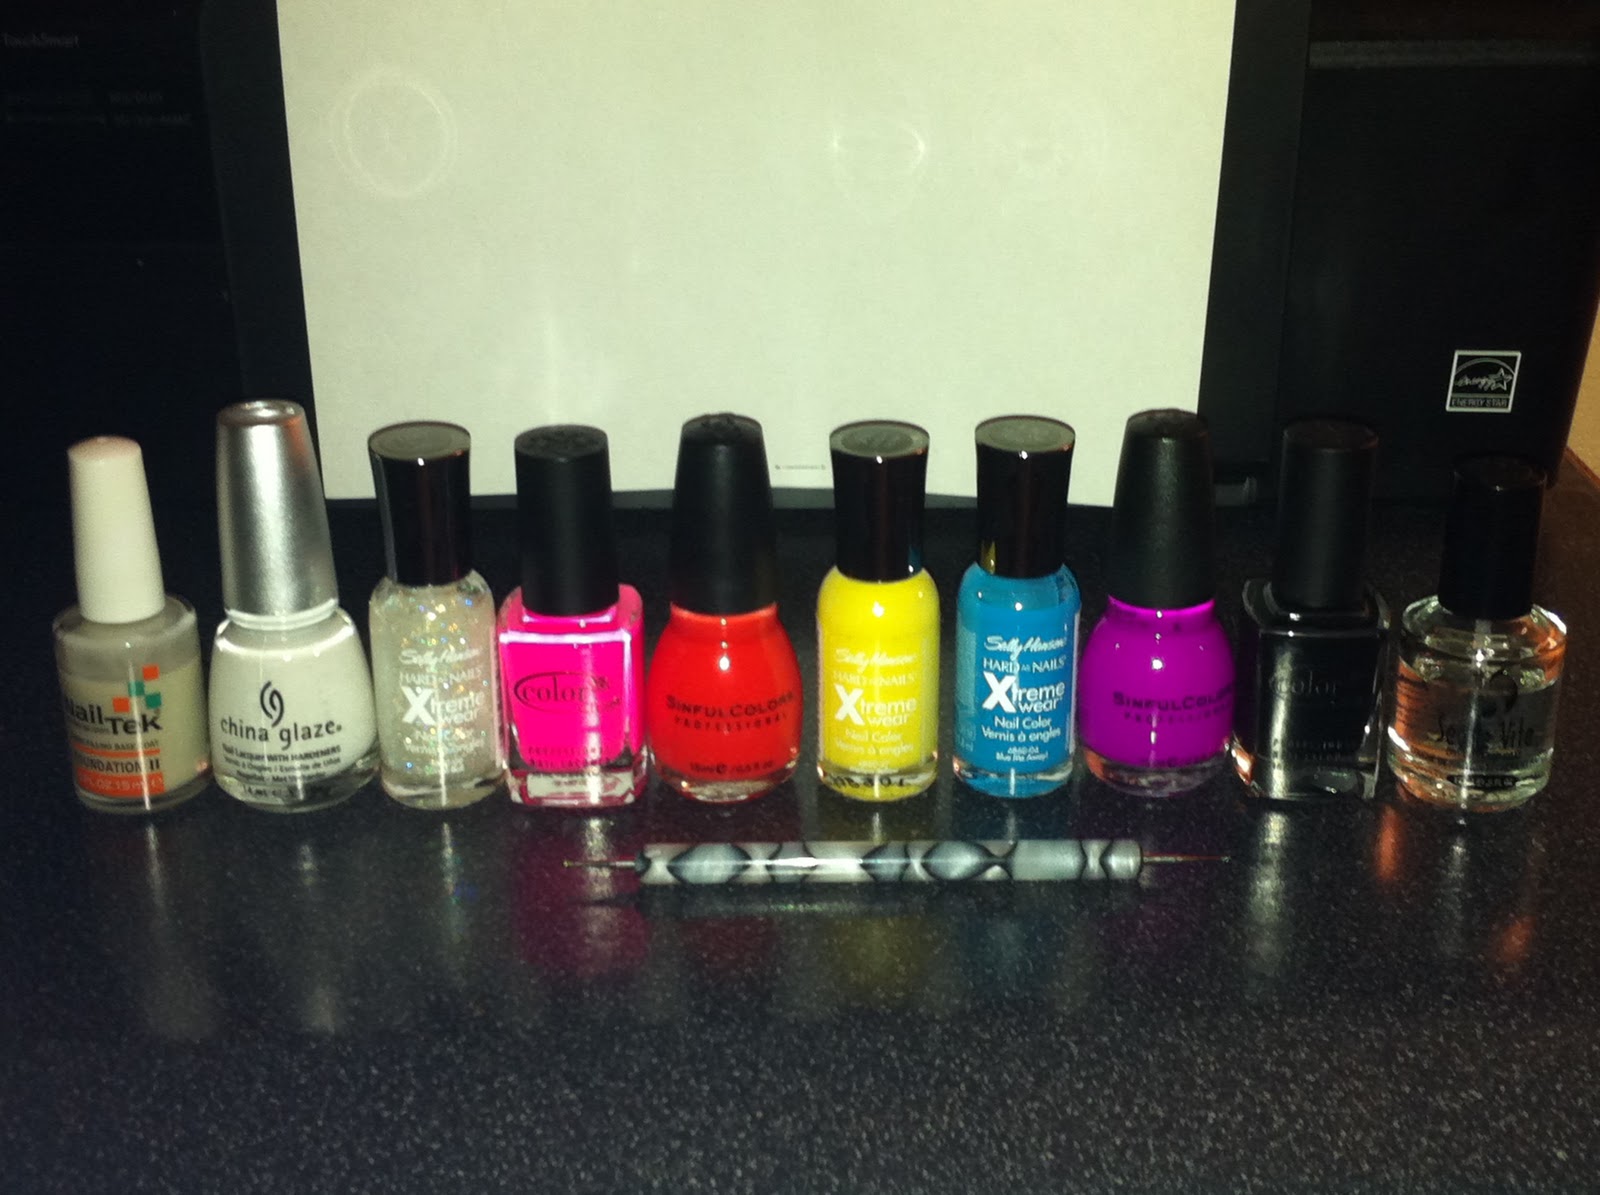
basecoat (NailTek), white polish (China Glaze's "Snow"), rainbow colored glitter top coat (Sally Hansen's "Disco Ball"), hot pink polish ( Color Club's "Poptastic"), orange polish (Sinful Colors' "Big Daddy"), yellow polish (Sally Hansen's "Mellow Yellow"), light blue polish (Sally Hansen's "Blue Me Away"), purple polish (Sinful Colors' "Dream On"), black polish (Color Club's "Where's the Soiree"), fast drying top coat (Seche Vite), medium and small sized dotting tool  

ESTIMATED TIME: 1 hour

STEPS:
1. Start off painting your nails with a basecoat to protect your natural nails. Then paint your nails with two coats of a white polish, like China Glaze's "Snow". Optional: After painting your nails white, you can also paint your nails with a disco shimmer top coat like Sally Hansen's "Disco Ball".

2. Use a sheet protector, like I did, or an index card to blot your hot pink nail polish.

3. Grab your medium-sized dotting tool, and create one random dot of this color per nail.

4. Repeat step 3 with...
orange 

yellow

blue

and purple

5. Now take your black polish and blot a small circle of polish.

6. Grab your small sized dotting tool and create these symbols, ( ) --> ( . --> ( --> O ,around the random dots. Be creative! It does not need to be perfect!

7. As you can see in the previous picture, in step 6, there are some empty spaces of white on your nail. Fill in these spaces with random black dots, using your dotting tool. Try to make the black dots different sizes.

8. Once you have filled in the empty spaces, dry your nails for about 2-3 minutes, then apply your fast drying top coat.

9. Let your nails dry and your done!!

Wednesday, September 21, 2011

Half Moon Manicure

Flash back to the 1920s and 1930s with this vintage, elegant, and simple half moon manicure design. Half moon manicures were very popular back then, but like many fashion trends, this manicure design is coming back! Half moon manicures are also known as "reverse french manicures".

WHAT YOU NEED:
**From left to right** base coat (NailTek), white nail polish (China Glaze's "Snow"), fine silver glitter nail polish (Konad's Sliver Glitter Top Coat), black nail polish (Color Club's "Where's the Soiree"), silver glitter striper (Kiss's Silver Glitter), fast drying top coat (Seche Vite), dotting tool, rhinestones, hole reinforcements

ESTIMATED TIME: 45 minutes-1 hour

STEPS:
1. Ready your hole reinforcements on the edge of a table before painting your nails.
**It works best if you cut your reinforcements in half** 

2. Apply a base coat to protect your natural nail. Then paint your nails with two thin coats of China Glaze's "Snow".

3. Paint over the white with Konad's Sliver Glitter Top Coat, or any fine silver glitter top coat, then apply one coat of a fast drying top coat like Seche Vite.
**Let your nails dry for 5-10 minutes**

4. When you can run your finger over your nail without smudging, place your half hole reinforcements on the bed of your nail. You can show as much or as little of the white as you would like, it's up to you!
**Again, cut your reinforcements in half!! Do not leave them whole like I did!**

5. Make sure your reinforcements are sticking to your nails. Then apply one coat of a black nail polish, like Color Club's "Where's the Soiree". Let your black polish dry for 5 minutes, then use tweezers to lift the reinforcements.

6. Use a silver glitter nail striper to create a thin line of glitter to separate the black and white polish. DO NOT do this on your ring finger, or whichever finger you choose.

7. Use your dotting tool to create a tilted bow on tip of the nail of your ring finger. Then apply a second coat of your fast drying top coat to all of your nails EXCEPT your ring fingers.

8. Get out your rhinestones and dotting tool. Finally apply that second coat to your ring finger. Take your dotting tool and dip it into clear nail polish. Apply rhinestones to the knot of the bow and also on the line that separates the black and white. WORK QUICKLY!!

9. Add one final coat on your ring finger to seal your rhinestones, and you're done!!

Thursday, September 15, 2011

Tribal Nails


These nails are for the experimental girl who loves a bit of an edgier look or for anyone who loves print nails like I do!!

ESTIMATED TIME: 1 1/2 hours

WHAT YOU NEED:
**from left to right** base coat (NailTek), gold nail polish (Sally Hansen Complete Salon Manicure's "Gilty Pleasure"), black nail striper (Kiss's black), black nail polish (Sally Hansen's "Black Out"), fast drying top coat (Seche Vite), dotting tool and/or small detail brush

STEPS:
1. Start off with your choice of your favorite base coat. Then paint your nails with two coats of a gold color (or any color you prefer). I really like Sally Hansen Complete Salon Manicure's "Gilty Pleasure" because it isn't a tacky gold color, in my opinion.

2. Use a black nail striper and create thick "X"s on your nail.

3. Again, take your black nail striper and create a "V" on the openings of the "X" you created.

start on the tip of your nail...

then the left side...

then at the bed of your nail...

then the right side...

4. Then use a dotting tool or detail brush to fill in the side "V"s with black nail polish, making triangles. You can have fun with it and alternate the "V"s you fill in on each nail, or keep them all the same.

I alternated them!

5. Now take your dotting tool and some black nail polish, and create a black dot in the "V"s you did not fill in.

6. Clean off your dotting tool, then take your gold nail polish and create a gold dot in the center of the black triangles you filled in.

7. Once you have filled in all of the dots to your design, apply 2 coats of a fast drying top coat.

8. And you're done!!

I hope you liked this design!

Tuesday, September 6, 2011

Print Nails, WOW!!

This fun and edgy print design is sure to "wow" all of you friends! It's super easy. All you need is a little bit of patience and the proper materials!

WHAT YOU NEED:

**from left to right** base coat (NailTek), red polish (Revlon's Top Speed "Fire"), black polish (Sally Hansen's Hard as Nails "Black Out"), white polish (SinfulColors "Snow Me White"), fast drying top coat (Seche Vite), and a detail brush

**Feel free to change up any of the colors! If you'd like, and have the patience, you can have the print design on all of your nails**

Estimated time: 45 mins-1 hour (it really depends on how steady your hand is)

STEPS:
1. Start off by painting all of your nails with a base coat. Then use your red polish and paint your pinkie, ring, and index finger. Then use your black polish to paint your thumb and middle finger. Apply two coats of each color onto every nail. Then apply one coat of your fast drying top coat to all of your nails. Let your nails dry for 5 minutes.

**Feel free to change the fingers that are painted black! You can also paint only one nail black, if you'd like**

2. Once your nails are dry, take your white polish and create a small puddle of white nail polish. It is best to keep those puddles small, because they will dry and you don't want to waste your polish. Once you've created a small puddle, take your detail brush and dab it into your white polish.

3. With your detail brush and white polish, carefully paint your print on your nail. Be creative! You can use "WOW" like I did, or you can use something else like "OMG", "LOL", "HA", etc. It is best to use a word or acronym that is three letters or less, so it can easily be repeated. Paint this on your middle and thumb finger. The letters do not need to be perfect! Clean your detail brush with nail polish remover (I think acetone works best).

**Your puddles of nail polish will dry during this process, and as they dry, your polish will also become stringy. If/when this happens, just create a new puddle and clean your brush**

4. Like step 2, again you are going to create a small puddle, but with red polish this time. Take your cleaned detail brush and dab it into the red nail polish. Choose random letters to highlight with the red. Simply trace those letters with the red polish. You may need to trace over twice, depending on how thick your red polish is. Try your best to stay on the the white.

 5. Once you are done highlighting your design with red polish, apply a second coat of your fast drying top coat to all of your nails to protect your design and add extra shine.


6. Let it dry and you're done!