MATERIALS NEEDED (from left to right):
base coat (Nail Tek ridge-filling base coat), your choice of nail color (China Glaze-Diva Bride), black nail striper (Kiss-Black), black nail polish (Sally Hansen Hard as Nails- Black out), fast drying top coat (Seche Vite), and *an optional* anti-chip top coat (Sally Hansen Acrylic Top Coat)
Estimated time: 1 hour
**Feel free to mix it up and use your own colors!**
STEPS:
1. Paint your nails with 1-2 coats of a base coat. A base coat helps protect your nail from staining. It also gives your nail color something to hold onto, so it's not spilling over your cuticles. I love using this Nail Tek base coat because my nails are very thin from getting fake nails.
As you can see, it dries so that it looks like my natural nail.
2. Paint your nails with two coats of your choice of nail color. I used China Glaze's Diva Bride. I like this color because it provides a softer and more elegant touch to the design.
**Make sure to paint the tips and sides of your nail!**
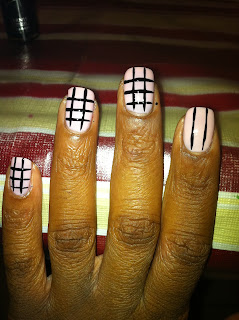
3. Use a black nail striper (picture on the left showing nail polish with a thin brush) and create a checkerboard pattern (picture on the right). Simply draw 2 vertical lines and 3 horizontal lines on all of your nails. Try to make the lines as evenly spaced as possible.
4. Put a glob of black nail polish on a piece of paper. You can also use and index card, paper plate, or sheet protector. I love using a sheet protector because it works as a convenient place mat to do your nails, so you don't make a mess. Fill in every other space using a dotting tool or small, square paint brush. Be very careful filling in the squares.
5. Once you are finished filling in the squares and your black polish is dry, use a fast drying top coat to finish your design! Seche Vite works amazingly fast, completely drying the nail in about 20 minutes, and adds an incredible shine!
**6. Lastly, and this is optional, add an acrylic anti-chip top coat. This adds a salon-finished shine to your nail. This is crucial for me because I am a server and my nail polish chips very easily if I do not add this step. This is also great for those who also use their hands often or for moms! No one likes chipped nail polish!!**
Enjoy your classy design!


No comments:
Post a Comment