

WHAT YOU NEED:

**Feel free to change up any of the colors! If you'd like, and have the patience, you can have the print design on all of your nails**
Estimated time: 45 mins-1 hour (it really depends on how steady your hand is)
STEPS:
1. Start off by painting all of your nails with a base coat. Then use your red polish and paint your pinkie, ring, and index finger. Then use your black polish to paint your thumb and middle finger. Apply two coats of each color onto every nail. Then apply one coat of your fast drying top coat to all of your nails. Let your nails dry for 5 minutes.

**Feel free to change the fingers that are painted black! You can also paint only one nail black, if you'd like**
2. Once your nails are dry, take your white polish and create a small puddle of white nail polish. It is best to keep those puddles small, because they will dry and you don't want to waste your polish. Once you've created a small puddle, take your detail brush and dab it into your white polish.


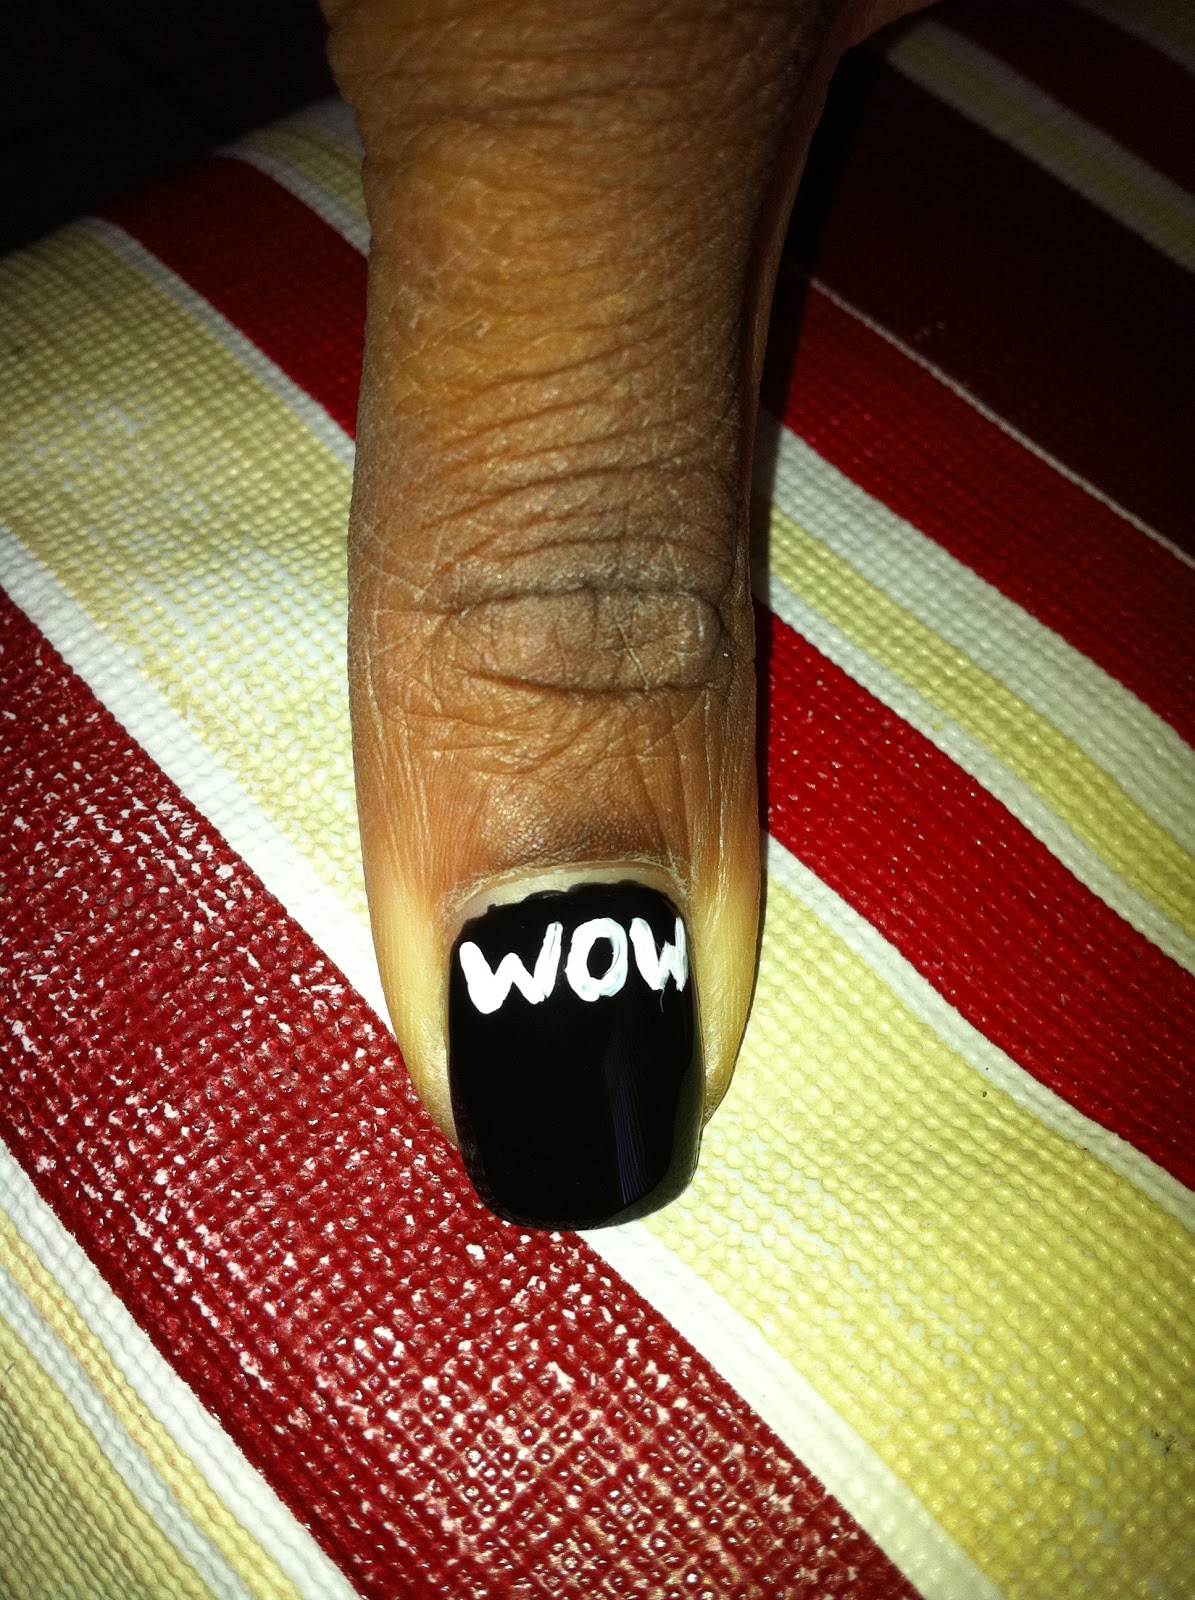
3. With your detail brush and white polish, carefully paint your print on your nail. Be creative! You can use "WOW" like I did, or you can use something else like "OMG", "LOL", "HA", etc. It is best to use a word or acronym that is three letters or less, so it can easily be repeated. Paint this on your middle and thumb finger. The letters do not need to be perfect! Clean your detail brush with nail polish remover (I think acetone works best).


**Your puddles of nail polish will dry during this process, and as they dry, your polish will also become stringy. If/when this happens, just create a new puddle and clean your brush**
4. Like step 2, again you are going to create a small puddle, but with red polish this time. Take your cleaned detail brush and dab it into the red nail polish. Choose random letters to highlight with the red. Simply trace those letters with the red polish. You may need to trace over twice, depending on how thick your red polish is. Try your best to stay on the the white.

5. Once you are done highlighting your design with red polish, apply a second coat of your fast drying top coat to all of your nails to protect your design and add extra shine.

6. Let it dry and you're done!

No comments:
Post a Comment