Trick or treat?!! Treat yourself to this fun mummy nail art design and spook up your Halloween!
WHAT YOU NEED:
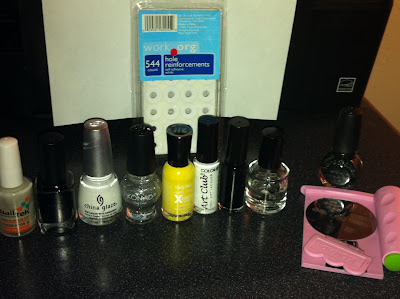
base coat (NailTek), black polish (Color Club's "Where's the Soiree"), white polish (China Glaze's "Snow") with silver glitter (Konad), yellow polish (Sally Hansen's "Mellow Yellow"), white nail striper (), black nail striper (), fast drying top coat (), hole reinforcements, dotting tool, and Konad stamping materials **optional**
ESTIMATED TIME: 1 hour and 30 minutes
STEPS:
1. Cut 5 hole reinforcements in half before painting your nails with your choice of base coat, then paint your nails with a black polish, like Color Club's "Where's the Soiree". Dry your nails for five minutes or until your black polish is dry to touch, then position your hole reinforcements at the tip of your nail.
**Line up the curve of the hole reinforcements with your nail beds**
2. Paint your nails with a shimmery white polish. I did not have a shimmery white polish, so I achieved this look with China Glaze's "Snow" white polish and Konad's silver shimmer top coat. Again, let your nails dry for five minutes or until your shimmery white polish is dry to touch.
3. Once your shimmery white polish is dry, carefully peel off your hole reinforcements.
4. Use a white nail striper, or polish with a thin brush, to fill in the bottom of your nail. By doing this, you want to connect the white polish on both sides of the nail, only leaving enough of the black polish showing for mummy eyes.
creating the mummy wrap effect...
5. Now, I used Konad nail stamp plate 56; but most people do not have these materials, and it can be a little costly to purchase them. SO you can easily create the same effect with a black nail striper!
6. In the black space, use a large dotting tool and yellow nail polish, like Sally Hansen's "Mellow Yellow", to create 2 yellow eyes on each nail.
7. Now use a medium-sized doting tool to create the mummy's pupils with black polish, like Color Club's "Where's the Soiree".
**Red polish, instead of black, would also look really cool to create the pupils!!**
8. Lastly, clean up around your cuticles and apply a fast drying top coat, like Seche Vite, to protect your design and dry your polish quickly...
and you're done!


No comments:
Post a Comment